Table of Contents
Ever feel like your serene Minecraft Japanese house is missing something? Like a secret passage to another world? I get it. We're not just building pretty exteriors here, we're crafting entire experiences. That's where the magic of a minecraft japanese house underground connection comes in. Think hidden dojos, secret gardens, or maybe even a portal to the nether, all tucked away beneath the tranquil surface of your build. This isn't just about digging a hole; it’s about expanding your creativity and making your Minecraft world feel truly unique. This article will guide you through the process of not only understanding why an underground connection elevates your build, but also provide you with practical tips to design and build your own. I'll share some tricks I've learned and show you how to create a seamless transition between the traditional Japanese aesthetic above ground and the hidden wonders beneath. Get ready to transform your builds from simple structures into intricate, multi-layered masterpieces.
Why an Underground Connection Enhances Your Minecraft Japanese House
Why an Underground Connection Enhances Your Minecraft Japanese House
Adding Depth and Mystery
Let's be honest, a house just sitting on the ground is, well, a bit boring, right? A minecraft japanese house underground connection is like adding a secret level to your favorite video game. It transforms a simple structure into something more complex, creating a sense of mystery and intrigue. It’s no longer just a place to store your crafting table, it becomes a place of hidden depths. I once built a seemingly simple Japanese house, but underneath, I had a massive library, and that was so cool, because you would never guess it's there from the surface.
Think about it, you could have a hidden entrance behind a waterfall, or maybe a secret door disguised as a bookshelf. The possibilities are endless, and each one adds a layer of depth to your build that you just can't get from the surface alone. It's not just about what you see, it's about what you *don't* see, that makes the difference.
Maximizing Space and Functionality
Space is always at a premium in Minecraft, especially if you’re building in survival mode. An underground connection is like getting a free expansion pack for your house. You can add storage rooms, crafting areas, or even entire underground farms without cluttering your main living space. This is something I have done a lot, I can have a small house above and a huge farm underneath, which is great for survival.
It's a really clever way to keep your house looking clean and minimalist, while having all the functionality you need. Instead of having chests and furnaces scattered around, they can all be tucked away below ground, creating a much more streamlined and aesthetically pleasing environment. It also lets you get creative with the layout and create unique spaces you would not normally have above ground.
Feature | Above Ground | Underground |
|---|---|---|
Space | Limited by build area | Expands usable area |
Functionality | Visible, can clutter space | Hidden, keeps main area clean |
Aesthetics | Simple, single-layered | Complex, multi-layered |
Creating a Unique Player Experience
Ultimately, a minecraft japanese house underground connection is about creating a unique player experience. It's about adding a personal touch that makes your build stand out. It allows you to tell a story with your build, inviting players to explore and discover hidden secrets. I once saw a build where the entire underground was a maze with hidden rooms and puzzles, and it was way more interesting than just a regular house.
It's not just about building a house; it's about building an adventure. Whether you're creating a hidden laboratory or a cozy underground living space, the underground connection is what transforms your build from a simple structure into a memorable and engaging experience. It's about adding a personal touch that makes your build your own.
Designing Your Minecraft Underground Space: Practical Tips
Designing Your Minecraft Underground Space: Practical Tips
Planning Your Layout
Okay, so you're ready to dig into your minecraft japanese house underground connection. But hold up a sec! Before you start randomly tunneling, let's talk planning. Think about what you want your underground space to *be*. Is it a hidden storage area? A secret crafting room? A massive underground garden? Knowing your purpose is key. I like to sketch out my ideas on paper first, like a blueprint, it helps me visualize the space and prevent me from ending up in random dead ends. Consider the size of each room, the flow of traffic, and how it will connect to your house above. Remember, good planning is half the battle.
Don't just dig a giant box; think about different levels, corridors, and maybe even a central hub. You could have a main staircase leading down to a central room, with smaller rooms branching off from there. This creates a more interesting and engaging space. You can even use different block types to define different areas. For example, I use stone bricks for hallways and wooden planks for living areas. It's all about making it functional and aesthetically pleasing.
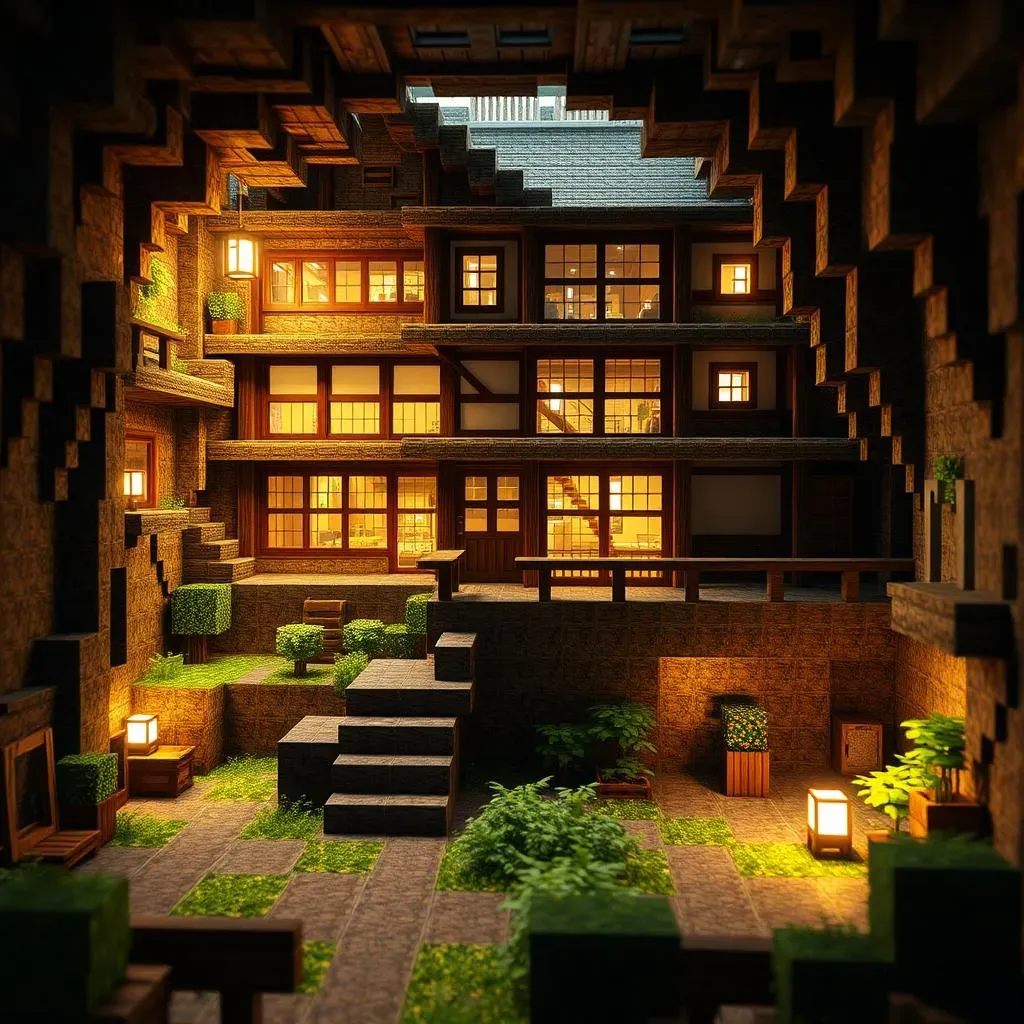
Lighting and Atmosphere
Now, let's talk about lighting. You don't want your underground space to be a dark, spooky cave, unless that's your goal. Torches are the basic solution, but why not get creative? I like using glowstone or sea lanterns for a softer, more ambient light. You can even hide them behind blocks or use them as part of your design. For example, I once built a Japanese garden underground and used sea lanterns hidden under the leaves to create a really cool effect. It's all about setting the right mood.
Think about how the lighting affects the atmosphere of the space. Warm, yellow light can create a cozy, inviting feeling, while cool, blue light can make it feel more mysterious and modern. You can also use different light levels to highlight certain areas or create a sense of depth. Don't be afraid to experiment with different lighting techniques to find what works best for your build. And remember, light isn't just about visibility; it's about creating the right *feeling*.
Lighting Option | Light Level | Atmosphere | Best Use |
|---|---|---|---|
Torches | 14 | Basic, functional | General lighting, survival |
Glowstone | 15 | Warm, ambient | Decorative, softer light |
Sea Lanterns | 15 | Cool, bright | Modern, underwater builds |
Hidden Lights | Variable | Mysterious, dramatic | Highlighting features |
Material Choices and Aesthetics
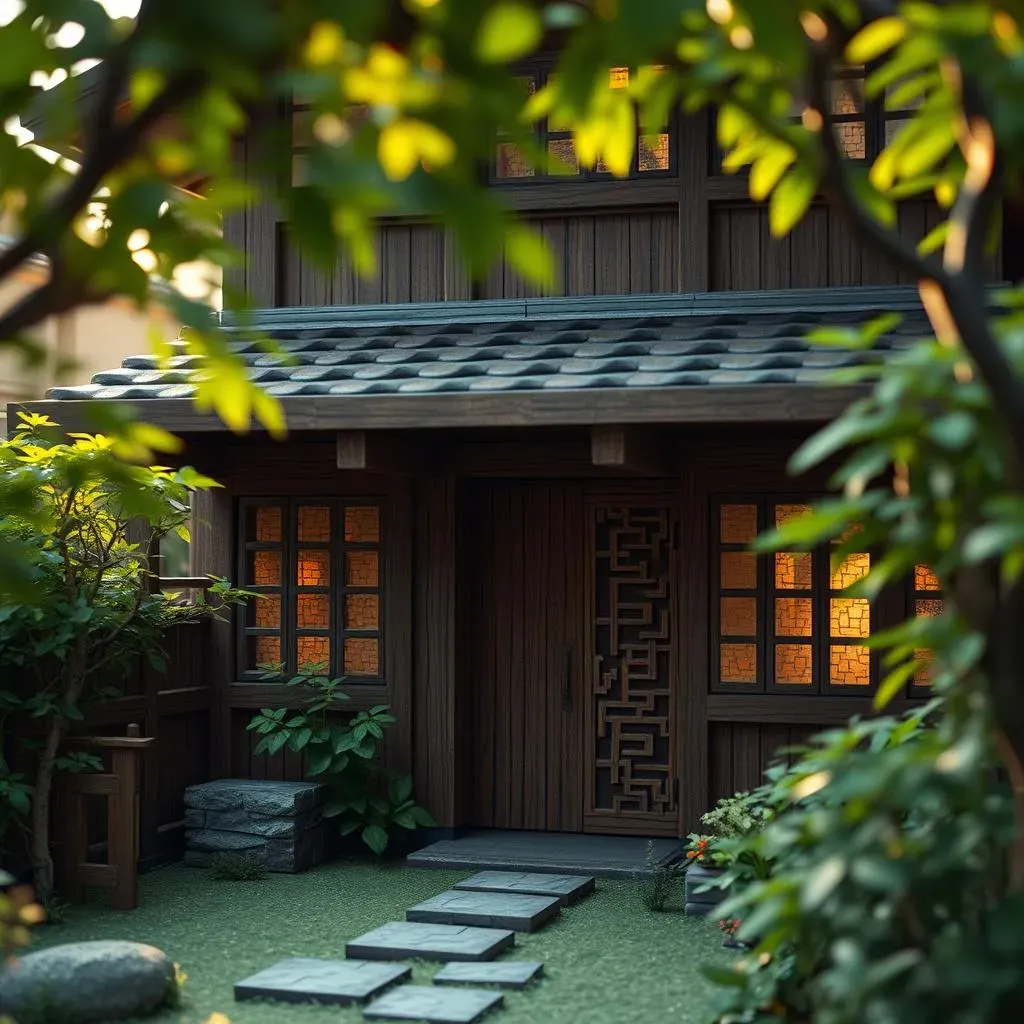
Choosing the right materials is crucial for creating a cohesive look for your minecraft japanese house underground connection. You want it to feel like a natural extension of your Japanese house, not some random cave system. I usually stick with materials that complement the ones I used above ground. So if you used a lot of dark oak, maybe use that in your underground build as well. It’s all about creating a sense of harmony and continuity.
Don't be afraid to mix and match different textures and colors, but try to keep it within a reasonable palette. For example, stone bricks, smooth stone, and wood can create a nice contrast while still feeling cohesive. You can also add some decorative elements like carpets, banners, or even paintings to personalize the space and make it feel more lived-in. Remember, the goal is to create a space that feels both functional and visually appealing, a place you enjoy spending time in.
StepbyStep Guide: Building the Perfect Minecraft Japanese House Underground Connection
StepbyStep Guide: Building the Perfect Minecraft Japanese House Underground Connection
Creating the Entrance
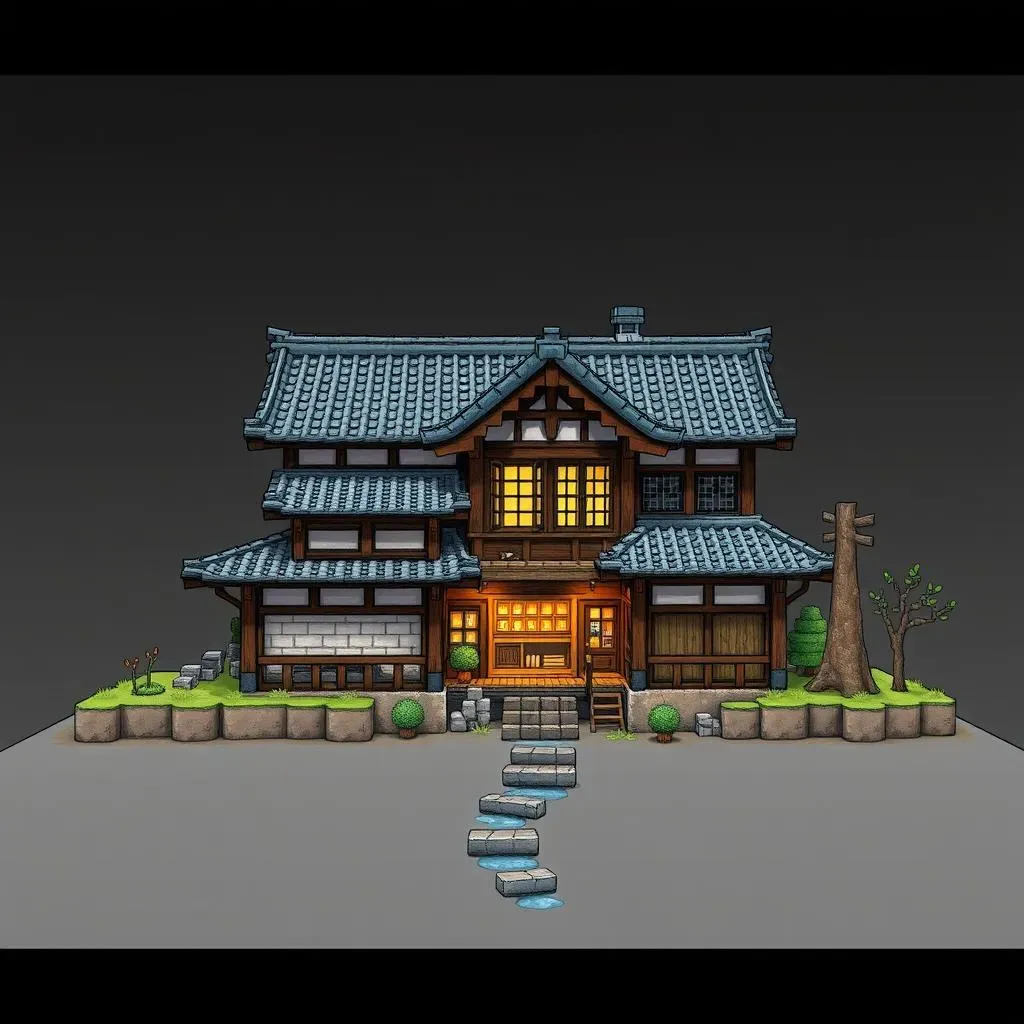
Alright, let's get our hands dirty! The first step in building your minecraft japanese house underground connection is creating the entrance. Now, you could just dig a hole, but where's the fun in that? I like to make it a little more interesting. Start by identifying where you want your entrance to be, I usually try to make it as hidden as possible, maybe behind some bushes or under a trap door in the house. Once you have the location, start digging down, but don't just make it a straight drop. Add a few curves and turns to make it feel less like a mine shaft and more like a secret passage. Consider using stairs or a ladder for a more realistic feel.
Think about how the entrance integrates with the design of your house. Does it feel like it belongs there? I once built a secret entrance that was hidden behind a bookshelf. When you activated a hidden lever, the bookshelf moved to reveal a staircase leading down to my underground base. It was a real "wow" moment for anyone who saw it. Remember, the entrance is the first impression of your underground space, so make it count. Make it functional, but make it fun too. It should be a smooth transition between the above-ground and the underground, so try to keep the aesthetic consistent.
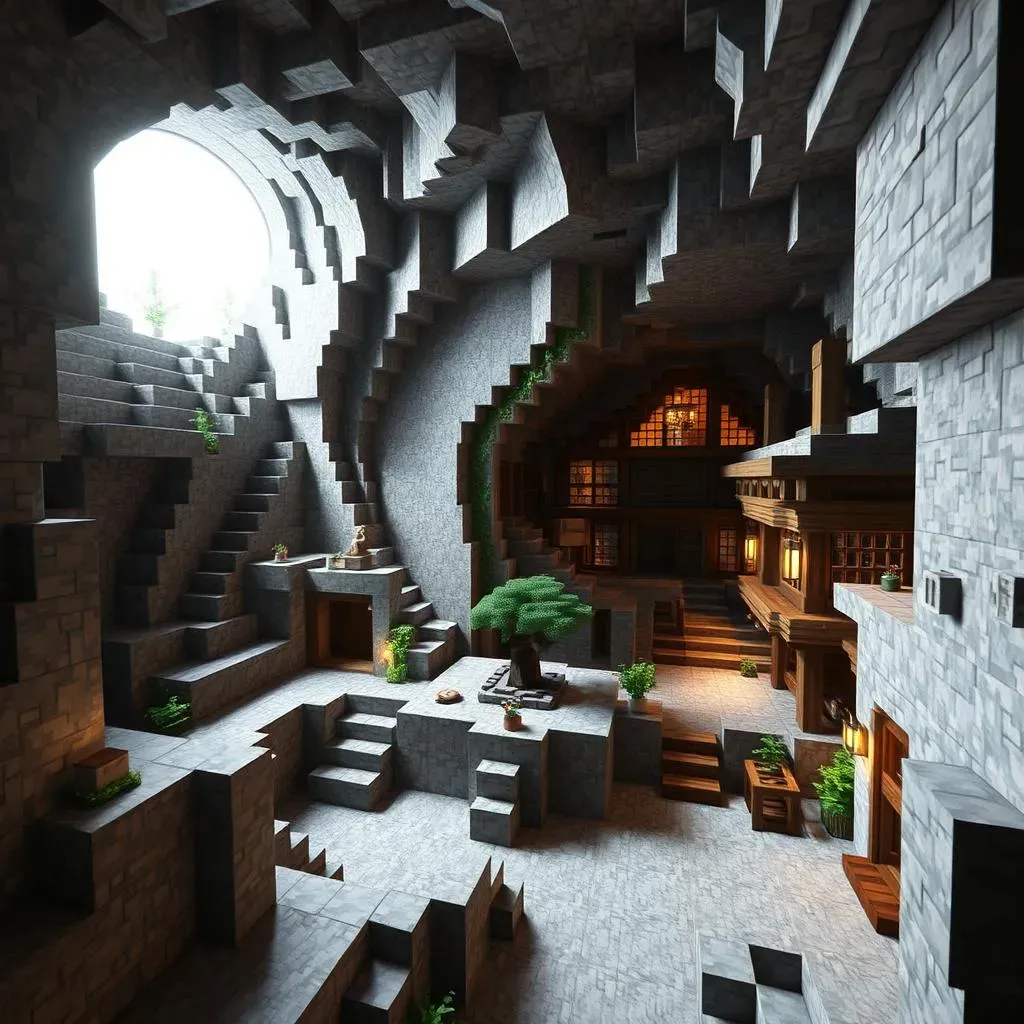
Excavation and Structure
Okay, now for the real work: excavating your underground space. This is where your planning comes into play. Follow your blueprint and start digging out the rooms and corridors you planned. Don't just dig a giant box, try to create different levels and rooms to make it more interesting. I also like to add little details as I go, like small alcoves or hidden passages. For the walls and ceiling I use a mix of stone bricks and smooth stone. Also, be sure to add support beams to prevent cave-ins. It's always a good idea to use a grid when building, it helps keep everything aligned and symmetrical.
Once the excavation is done, it's time to start building the structure of your underground base. This is where you start to bring your vision to life. Use the materials you have chosen to build the walls, floors, and ceilings. Add decorative elements like carpets, banners, and paintings to personalize the space and make it feel more lived-in. Don't be afraid to experiment with different designs and layouts. The underground is your playground, so have fun with it. I usually create a central hub with corridors leading to different rooms, it makes it easier to navigate. And don't forget to add some lighting to make it safe and visible. Remember, this is your space, so build it the way you like it.
Step | Action | Tip |
|---|---|---|
1 | Plan Entrance Location | Make it hidden and accessible |
2 | Dig Entrance Tunnel | Add curves and turns for realism |
3 | Excavate Rooms | Create different levels and shapes |
4 | Build Structure | Use support beams and decorative elements |